Going Medieval’s early access launch is finally upon us. Players are now able to get straight into this colony builder set in the medieval times. One of the most important parts about Going Medieval is the building. Creating shelter and a place to call home for your colonists is very important at the start. The building can be a little confusing at first so this guide will help you to learn to build a roof on your shelters.
How to Build a Roof in Going Medieval
In order to build a roof on a room in Going Medieval you will need some walls on either side of the room. Once you have walls, (or at least blueprints for a wall down) you are able to plan some roofing. Follow the following steps:
- Select the Base building option from the bottom of the screen. (Or press F1)
- Select the Wicker Roof option and then select a style of roof from the sub-menu
- Drag the blueprint from one corner of the walls to the other. You cannot create overhanging roofs without wall support underneath
- You colonists will now build the roof whenever it is prioritized
Keep in mind that you will need to place walls down first. Don’t forget that there are many different styles of roof from different materials. You are not bound to a hay roof if you don’t want one. Different materials have different types of protection and statistics. You can find a step-by-step guide below for the whole process if you are still having trouble.

How to Build a Roof Step-By-Step
For those wanting to place their roof this guide will go into more detail.
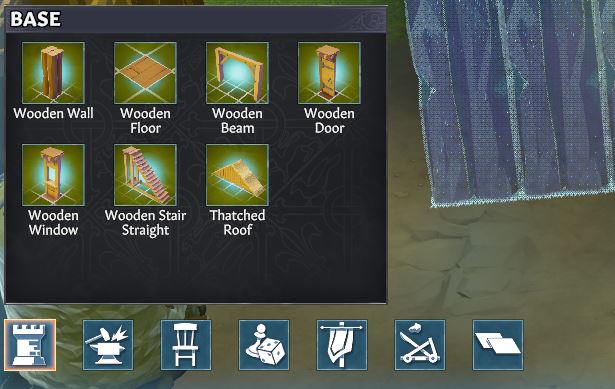
First off, we need to build some walls. Obviously, this is the base of the room. You will also need an empty wall space or a door so your colonists can get into the room. Go to the build menu on the bottom left under base. You are able to place any type of wall you desire. At the start of the game, you may only have access to wooden and stone walls. Now place your desired room size. Be aware if the room is too big, you may need some supports in the middle.
Now that you have a room built, or even just the blueprints set out, you can build a roof on top of it. Once again in the base menu you will find the option to place down a roof. In the image below you can see the thatched roof as the base option. This is because I chose the thatched roof the last time I built.
Building Roofs With Different Materials
You are not bound to whatever material is listed here. You do have the option to use different materials for most of the building pieces. First, select the roof with whatever material is listed there. Now, a smaller sub-menu will appear to the right of this menu. At the bottom of this menu, you are able to select a different variant of the building piece. Using this method you are able to build different types of walls and other items as well. See the image below.
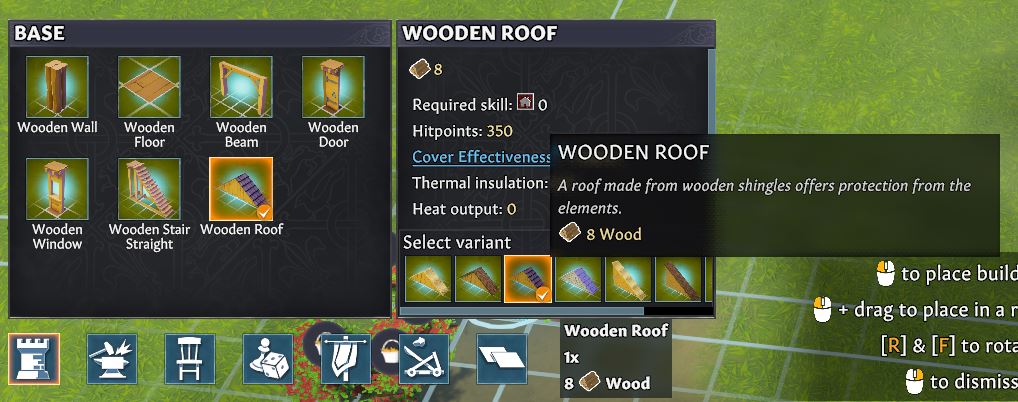
This may not be apparent at the first glance. You can see even with no research completed on building there are a few different styles with different materials. in the beginning you can choose from a hay roof, thatch and a wooden roof. Eventually you will learn new building materials and styles as well.
Researching Roof Supports For Large Rooms
Now that you have a room laid out, it’s time to place down a roof. As above once you have found the perfect roof for your building let’s get it built! If you are planning on building a large room you will need some type of support for the roof. you should wait until the game tell you the building is too large before you do this. There is no point wasting resources on roof supports when you don’t actually need them. You can use a simple wall in the middle of a roof as a support. This is the easiest method. You can also research and build proper timber roof supports.
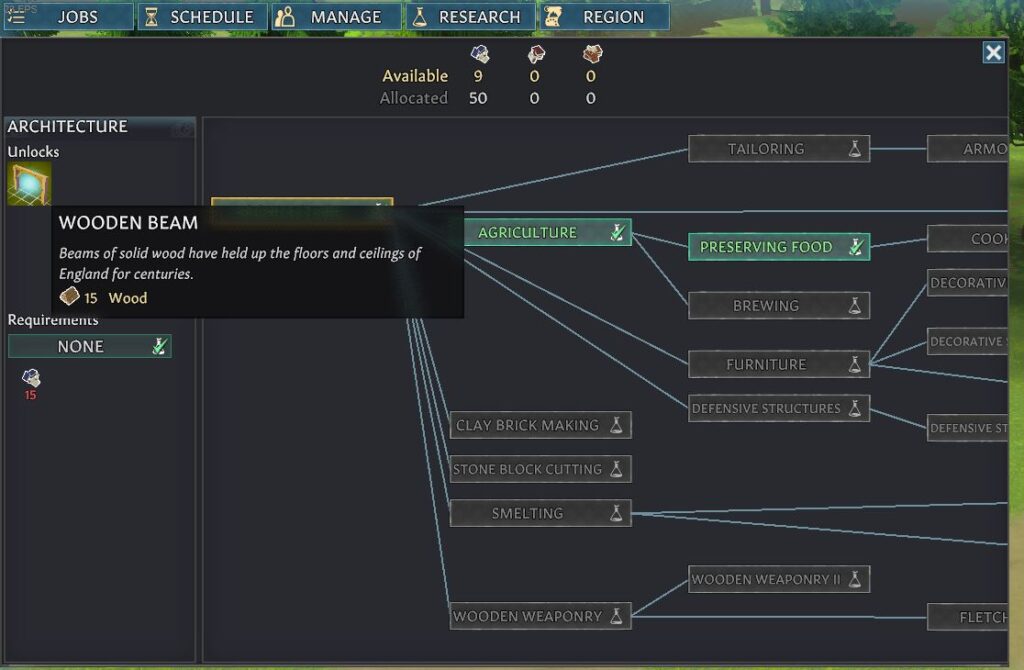
Here, the first research article is the architecture item. You will unlock a wooden beam. As you can see in the image above, the wooden beam helps support roofs and second story floors. To place this down, select the wooden beam and then put your cursor on a wall. The beam will automatically span across the walls and create a support. This will help when you are building very wide roofs.
Placing the Roof
Now that we have all the support we need and the room laid out you can place down the roof. Choose your roof style and place your cursor over the corner of the room. You should not have to adjust your Z level unless you are currently below the wall level. If so, press the Z key to move your camera up until you can see the top of the walls. Select the corner of the room and drag your cursor to the opposite corner of the room. You should see the shape of a roof being placed.
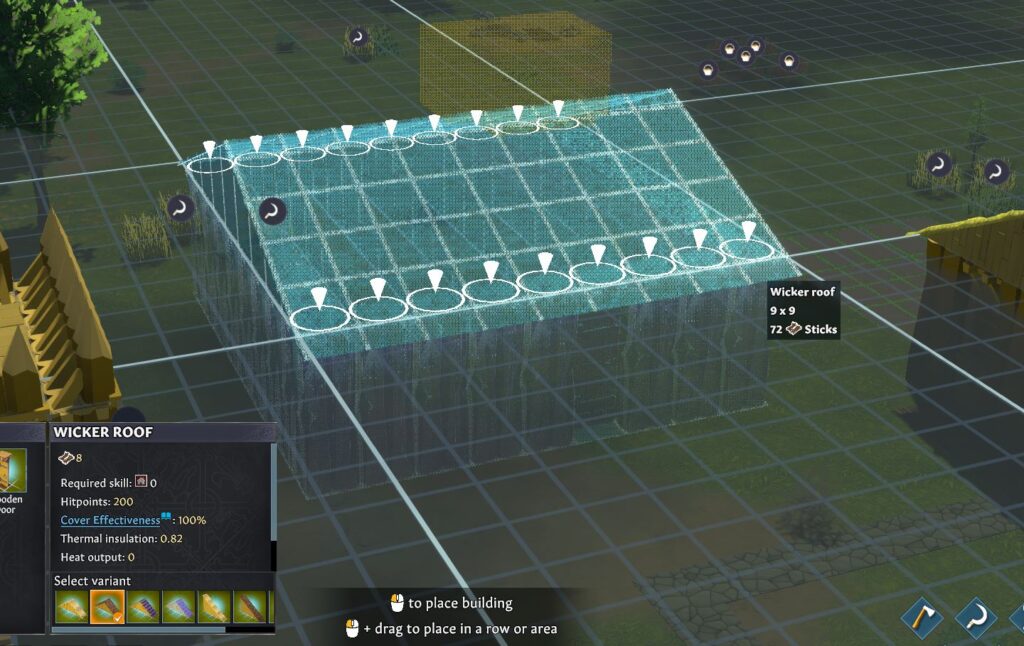
This menu will also tell you how many resources are being used in the construction of the roof. Make sure you pick a resource that you already have enough of, or is easy to obtain. In the image above I have building a wicker roof as sticks are easy to find. Release your left mouse button and the blueprint will be placed down. Your colonists will start building your roof when they have a chance and enough resources. Alternatively you can select a colonists and right-click the roof and select the option Prioritize constructing. This will have the colonist drop what they are doing and build the roof immediately.
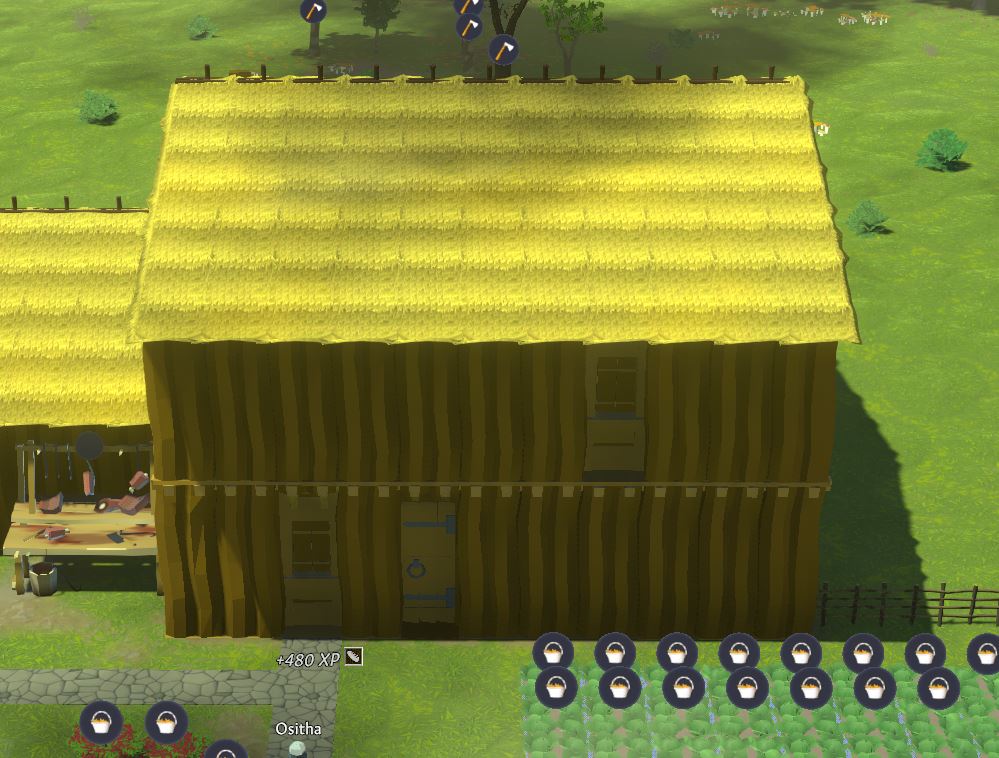
Voila! That is all there is to it. your building should now have a roof. This will protect your colonists from he elements and keep your production facilities operating at 100% capacity. Another great tip before the post is finished: You can use the C key to show/hide roof areas. This is great for taking screenshots like the one above, or seeing what your colonists are up to in their building!
I hope that this short guide on building a roof in Going Medieval helped you out! If you have any questions or suggestions on what the next guide should be, leave a comment below!